You are using Github as remote git repository? This article explains how to use Access Token to authenticate yourself instead of username+password.

Create an Access Token

On Github.com, navigate to the setting menu of your Github profile. From there, choose “Developer Settings” and then “Personal Account Tokens”.

Here you are able to create a personal account token:

create new token

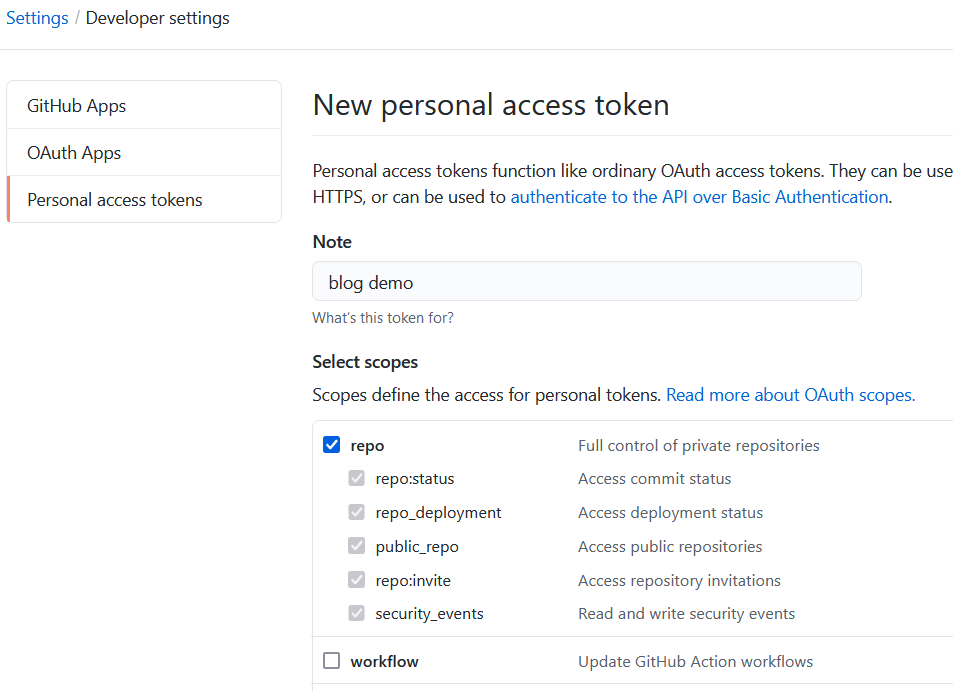
Select scope “repo”.

The token you created is presented to you. Save it to you credentials store (like KeePass).

Use the token

The token is part of the remote url of the repository. The URL has this form:

e.g. for a repo of mine and suppose the token is “token1234567890”:

When you are using the token in the remote URL you won’t be prompted for your password.

Good luck with your repo on Github!

Du benutzt Github als remote repository? Dieser Artikel beschreibt, wie Du Github Access Tokens nutzt, um Dich zu authentifizieren – anstelle von username/passwort.

Access Token erzeugen

Dazu gehst Du in das “Settings”-Menü und dort (links in der Link-Liste) auf “Developer settings) und dort weiter auf “Personal Access Tokens”.

Dort erzeugst Du ein neues Token:

Neues Token erzeugen

Als “Scope” “repo” ankreuzen.

Das erzeugte Token wird angezeigt. Unbedingt gut ablegen, man kann es sich nicht nochmal anzeigen lassen (aber neu erzeugen)

Das Token nutzen

Das Token wird nun in der remote url benutzt. Diese hat die Form

z.B. für eines meiner Projekte und einem Token “token1234567890”:

Wenn Du dieses Format nutzt, wirst Du nicht nach einem Passwort gefragt.

Viel Erfolg mit Github!

Recently on our team chat: “I removed the remote git branch and pushed again”. “Remove” was not necessary, he could have used “git push –force” or better “git push –force-with-lease” instead.

Why

The normal “git pushed” only works when the remote branch is contained in your local branch or in other words if your local branch is the same or ahead of the remote branch. When you still want to “overwrite” the remote branch with your local branch, use the “–force” option or the “–force-with-lease”.

Caution

When you collaborate with other team members on a remote branch, git push with force option may overwrite their work. “–force-with-lease” makes git check that the remote branch is in the state we expect it to be in before pushing the local branch, so you wouldn’t destroy work that you don’t know of.

When

We need to force push when

  • we changed our local branch history by rebasing or amanding
  • we need to “reset” the remote branch to our local branch

Summary

If you need to “overwrite” a remote branch with your local branch, use the “–force-with-lease” option.

Say your git repo consists of a subdirectory “app” and a subdirectory “database” (or “frontend” and “backend” or “team-a” and “team-b”) and you realize each directories content should be in its own repository. Here is how to split the repo.

To create a repo that consists of the content of the “database” dir and its history, execute

and then push it to a new remote:

This is what Gitlab states on a newly created project page. However in git push -u origin --all “-all” should be replaced with “–mirror” because “-all” pushes all local branches only so you would need to checkout all branches you want to keep. “–mirror” pushes remote branches, too.

In the same fashion apply “filter-branches” to the “app” directory.